Photobucket Photobucket Photobucket Photobucket Photobucket Photobucket Photobucket
SPACER
Showing posts with label home. Show all posts

Monday, December 13, 2010

Christmas...palooza?

First, this is Heather, and let me just write a quick THANK YOU!  Everyones kind wishes and comments for my birthday were so so so appreciated.  I love that I haven't met most of you in real life yet you'll still take time to write something nice.  I had a great birthday too, by the way :)  And remember, Megan's giveaway from her own fabric stash is still going through Friday.  Check this post out to see more and to see the fabric!

Hi, it's Megan now :)  We had such a good response last time I posted with a title including palooza, so what the heck, right?  I've got some pics of my own holiday decor that I wanted to share.  Let me remind you all that I'm the budget sister...with a hubby in school and two little ones, money is tight to non-existent!

I busted out all my Christmas things and to my horror I thought, "How on earth did I decorate last year?!?  This stuff is awful!!"  To be fair, we've moved, so that always throws a wrench in things.  I finally "finished" this past week and here's what I came up with.


For starters, my stockings!!!!  My sweet sisters made these for me as my Christmas gift. I was beyond giddy when I opened them.  These were the stockings of our youth!! I have mine somewhere, in a box, but these are so nostalgic for me :)  In the toe they added the snowflake and embroidered each of our names.  Love, love, love.

I did have to tease them a little.  My girl is WHITE.  Like pure white as snow.  My hubby and boys are a nice golden, but apparently felt doesn't come in "Caucasian".


I needed some height on the ends of my mantel, but honestly almost everything was out of my budget.  I found these at Hobby Lobby.  The candle and glass were 50% off each, totaling $5 for both.  Then I picked out a golden ornament, also 50% off for $1 and tied it all together with some tulle.  For that price I'm quite pleased!


In the middle I have three different glass vases and an apothecary jar.  These are just from around my house.  I filled them with ornaments I had from the past...ones that are glass and actually break. 

fabric is Groovy by Caleb Gray for Robert Kauffman

Here is a project a friend and I made.  If you look closely it is still missing the 0's and 5's, and I have my family name to add to the bottom :)  We got the idea a Pottery Barn advent calendar, I don't know if it is sold out but I can't find it to link it, sorry.  It turned out to be quite the ordeal to make, I'll have some pretty funny memories of putting this together!  I told my little boy that an elf comes every night and leaves candy for him until Christmas.  He checks first thing every morning.  And several times throughout the day :)

 The wreath and garland are from JoAnn's.  So cheap.  They do all their Christmas and holiday things on sale pretty much immediately.  It was all at least 60% off, less than $10 for all of it.

I guess just trust me, this is a great improvement from where I started!!

Thanks for stopping by :)

Thursday, October 28, 2010

Megan's Quilt Finish

Hi to everyone new who may be visiting our blog...welcome and take a look around! :) Friday is a few short hours away and it's the start of Blogger's Quilt Festival from Amy's Creative Side. My sister Heather and I have been anxiously awaiting this event for a while and we hope you like our quilts!

A while back I purchased some of Joel Dewberry's fabric line Deer Valley. I wanted to re-do my bedroom in aqua's and gray's with a little bit of orange in there. It took me a long time to decide what kind of quilt I wanted for the end of my bed...so I used some traditional piecing and a modern layout, and I present my quilt
And my pieced back (I just can't resist piecing the backs these days!)
Scrappy binding just fit perfect with this quilt and all the colors.

A closer look at the blocks.

Well I had a list of things I still had left to do.
Among them, a cute pieced blanket for the end of my bed :)
And I've decided to sell this quilt pattern!

For the next week starting NOW thru Thursday November 4th Heather and I are putting all of our patterns on SALE.
That's right.
click on the image to head straight to our shop!
You don't have to read that twice, buy one get one FREE.
Okay you can read it again, it's a cute image afterall.
So please head on over to our Etsy shop and take a look around.
While you're at it, you can pre-order Gaggle of Geese!
Just sayin'.

Don't forget to see my sister Heather's quilt finish!

Amy's Creative Side - Blogger's Quilt Festival

Wednesday, August 4, 2010

No. I. Didn't.

We moved.  And had to leave behind our entertainment center.  And we wanted a new TV.  What's this a recipe for?  Compulsive refreshing on craig's list. 
(There are hundreds of posts of furniture in my area daily!!)

So I snatched this little gem up.  We wanted something that was tall so our boys couldn't get to the tv, check.  (The power button on this tv has been snapped off from repeated torture.)  We also wanted something with storage, check.  We wanted something sturdy, solid oak, check.  Oh and something that I could paint, check.  And cheap, check.

Afters many hours and extreme heat, I give you our new tv console:
(because console is way cooler than entertainment center)


Okay, I love it.  So much cleaner, fresh and happy than before and DEFINITELY better than the card table we were using.

Here's what I did.

I purchased everything at Lowe's.  (No I was not paid to say that, but desperately wish that I was!)

  • removed doors and all hardware
  • cleaned everything with soapy water and dried
  • applied Klean-Strip Sander Deglosser, twice (left)
  • one coat of Valspar Primer (latex)
  • two coats of Valspar Glossy paint, color Du Jour (latex)
  • attached new hardware
  • hot glued in fabric
  • adorned with extra large tv


oh, and I spray painted my hinges black!  I didn't want to mess with trying to find the right size.
Let's talk about this fabric.
Before the insert was embossed glass with designs...not my style and hard to cover.

I thought a lot about what I would use to cover those doors, and though initially I thought fabric, I kept it deep down for fear of being mocked for my dumb idea :) 

One magical night, soon after it had dried, I teasingly placed a piece of fabric over the empty space.
{insert heavenly choir}
Not only did I LOVE the look....but remotes work through fabric!!!

The long and short of it is, I cut a piece of fabric about 1 inch larger in width and height than the size of the hole.  I would squirt a section of hot glue with my left hand and follow with my right hand adhering the fabric.  In the end I went around and trimmed the excess fabric.  Eventually I'd like to get some trim or piping and glue it around the inside edge to give it a more finished look.


Originally the right side was intended for a tv.  We're using it for more storage.


These boxes are from Ikea.  They are made to fit about 15 dvds each, it is $5 for 2 boxes.


There you have it!  I have another painting project (kitchen table and chairs) and I've got all the stuff....but I need a painting hiatus.

I will definitely be linking this project up!  Make sure to check out these parties!

Wednesday, June 9, 2010

I'm Dreaming AND a reveal...

It's official.  I am moving 1,400 miles away.  Whoa.  I have 10 days.

I recently made over my bedroom...although there are a few things I'd like to still do with it.  So,
today I was dreaming of all the things I could add to my new room once we arrive in Arizona.  See, I'm moving from what could be compared to a really crappy place to a really nice place.  I've got hardwood floors throughout.  Which means a lot of rugs.  And I'm finally ready for my room to be DONE!

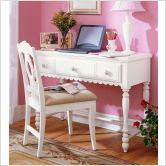
For starters, I'd like this vanity for my room.

Wouldn't I look adorable in that chair working on my blogs?  (I would.)

Then I'd like this chair to be sitting in an opposite corner:
That's where my husband would sit and look adorable reading medical books...zzzzzz...

And for our feet, I've been swooning over so many amazing rugs, this is what I want to be the last thing my feet touch before I snooze:

New rugs by Ms. Amy Butler...there were sooo many cute ones I just couldn't decide.

So you want to see what this all matches??

My Kinda Bedroom Reveal.
BEFORE:
This .jpg is titled shame.  This was at the start of my re-do.

PS Did I mention I did this in about 2 1/2 days??  I was crazy and decided to surprise my husband.  I started on Friday and he came home Sunday afternoon.

AFTER:
My fabric inspiration was Joel Dewberry's Deer Valley.
Call me a dumbo-head.  I have all these mirrored frames (to help with my accent color gray) and I didn't think about all the reflection possibilities.  I'm gonna work on that in my new place.
Imagine this:

  • slate gray duvet cover and matching shams behind my accent pillows

  • headboard raised a little

  • pieced quilt laid across the bottom with all my colors

  • an Amy Butler rug on my hardwood floors
that's the plan...
I showed in a tutorial here just exactly how I made those lamps.

And here I talked about re-making this memo board.

What did I do?
Here's the checklist:
spray painted headboard
stenciled and covered lamps
spray painted and stenciled memo board
spray painted a mirror and shadow box with my wedding bouquet inside (not pictured)
made 3 easy (no trim, just slip in the back) accent pillows
filled existing frames with photos
the pictures above the headboard are from our favorite vacation so far...the royal mile in Edinburgh Scotland on the left and Canterbury Cathedral in England on the right


Any tips?  Never share a half-finished project as a reveal in blog land.  It's in bad taste.  :)

PS We love to party, so check out our linky parties because we're linking up!

Thursday, June 3, 2010

Cover that shade!

We've been MIA, once again.  Have you been to our QuiltStory blog?  We've been so excited, we've been working hard on it all week.  Whether you make quilts or just admire, go check them out.  And let me say, these aren't your grandma's quilts, these are vibrant darling quilts that I'd love to have in my own home!! 
my aplologies to grandma's and grandma quilt likers :)

Plus in the morning we'll be featuring my fabulous friend Sara and I'd love to see her get many comments!!

I've been meaning to post this for a bit.  My lovely friend Sara gave me her lamps when she moved.  ...this really isn't a before picture...see they used to be brass lamps and she made the first great leap by spray painting the bases.  I LOVE the color, so I decided I wanted to cover the lamp shades with new fabric, and here's how I did it.


Let me apologize for the awful photos.  With two babies, I do most my crafting at night, thus ugly pictures.

I really wanted to get a white based fabric with some maybe a little aqua design to cover the shades with.  Shockingly I was unable to find such a fabric at Walmart or the local quilt shop.  I decided to make my own by stenciling.  More on that in a minute.

1. Roll your shade along the wrong side of your fabric tracing the top and then the bottom with a pencil.

2.  Cut about 1/2 inch larger than your pencil line on the top and bottom.


This is how I made my own design.  Do you know about Freezer Paper? It's awesome and can be used in many ways.  It can be purchased at most grocery stores.  There is a paper and shiny side.

3. On the paper side trace your image and cut out.

4. IRON the shiny side to the right side of your fabric and sponge paint into the stencil!  You can make whatever image you want, and the paint won't bleed through the sides.  ALSO, you can reuse the stencils over and over, it irons on and peels off easy peasy.


 5. Trickiest part.  Using Aleene's Tacky Spray adhere the fabric to the shade.  It's sticky and this took some trial and error.

6. Hot glue your edges by folding into the shade.  Add a trim if you'd like!


Ta-da!
When I move to Arizona (we're counting down the days!) I'd like to find the perfect trim for the top and bottom.  I'm pleased how they turned out, definitely a statement!

Saturday, May 15, 2010

From drab to fab

It is pretty rude of me to refer to this as "drab" considering my dear sister had made this for me.  However, she should be flattered because I love it and have had it in my room for several years!  I have changed my bedroom colors and the frame was in need of a paint job, so I decided to just re-do the whole thing.
My finished project!  I took it apart in the back and using a stencil I painted the Fleur De Lis onto plain white fabric.  Then I spray painted my frame, I believe the paint is called "Ocean Breeze".
It just looks so fresh and happy now!  As you can tell, I can't bare to place any memos on my memo board.  It just looks too pretty as is!

This was a small part of my bedroom makeover, which I will be sharing soon.  I went from creams, sages and blue to aqua, turquoise and white with some touches of gray and burnt orange.  It is so nice to finally do a little bit in my bedroom, it is always the last spot to get some love :)

Check out our linky parties button accross the top...see all the great places that we like to link up with as well as get fabulous ideas!! Hope you check them out soon!!

Monday, March 22, 2010

Mini Makeover REVEALED!

Emphasis on the mini.

You see, we're moving in a couple of months...and my baby has been sleeping in an office with a crib. I finally decided I wanted to make a few little things to make it his own room. When I was debating whether to do it in my head, I realized I decorate for Christmas, Valentines, and all these things that are just weeks, so I could definitely do this!

I started with the idea for artwork, three cars/trucks:
I decided to get canvas from Walmart...it was about $7 for all three, I painted around the border since my walls are already white, and mod podged the cars on. I used inspirations from Pottery Barn to create the cars and traced it onto scrapbook paper.
The one below was intended as a police car, and I used the yellow just for color. But once I put the siren on I realized it kinda looks like a cab! Either one works though.
So here is the bedding and pillows which I did make all of them, but not recently. If you've been following our blog for a while, I showed off my older son Sawyer's room a bit ago here...see I am one of "those" moms. Before I had kids I vowed I would never be walking around with two babies (that weren't twins). Well guess what? I did it. My boys are 18 months apart and so Sawyer moved into the toddler bed and Oliver moved right into the crib!
And this old clock, I had a post about this here.
And this corner is just in case he forgets his name. Wow! That's what happens when you make crafts at different times with no plan of where they'll go. I also mod podged over that shelf, we had it sitting around with no use and it was too old to return, it worked perfect!

Here is where told how I made the memory tin that reads "Oliver" and here you can learn to make the name blocks too!
Consider it revealed! It looks so much nicer than before. Promise. And no, you don't see the other wall because it's a desk :) I think when we move I'm going to hang the artwork with ribbon on some bright orange knobs, would that be cute?

Thursday, March 4, 2010

Mini Makeover Part 1 & . . .

We are moving in a few months, but I can't stand that my baby's room is an office with a crib in it. So I am doing a mini-makeover, complete with a little wall art, a mod podge shelf and re-doing an old clock.

I think I got this clock from my mom. Sorry momma, hope it wasn't a treasure of some sort.

It's oak around the outside with a gold rim. I know, it screams baby.

PS I know babies can't tell time, but I actually use this a lot, it's the perfect line of sight in my hallway.
And... I actually kinda love it. I took it all apart and painted the outside and the rim. Then I mod podged a simple car in the middle, which is going to match my artwork.

Part two coming in a few days!


ALSO THERE'S A GIVEAWAY!!!

There's a great site that is hosting a giveaway of our patterns. All you have to do it go the the Quilt Qua site and leave a comment on which TWO of our patterns you'd like to win!

If you're a beginner, I'd suggest Sweet Tweet and Crazy Daisy.
If you've had a little more practice check out Serenity Now, Tutu Pretty and Snakes, Snail & Wiener Dog Tails.

So please go sign up to win some of our patterns! We'd love to get lots of comments, and who knows maybe we'll have another pattern giveaway soon *wink, wink*