Photobucket Photobucket Photobucket Photobucket Photobucket Photobucket Photobucket
SPACER
Showing posts with label Sawyer. Show all posts

Friday, October 28, 2011

The 4 Year Old Quilt

Hi!  Welcome if you're visiting!  A quick little intro, my sister and I design quilt patterns and a little over a year ago we started Quilt Story.  Since then we don't blog as much as we want to here :(  But please stay, look around and then head over and see us at Quilt Story!

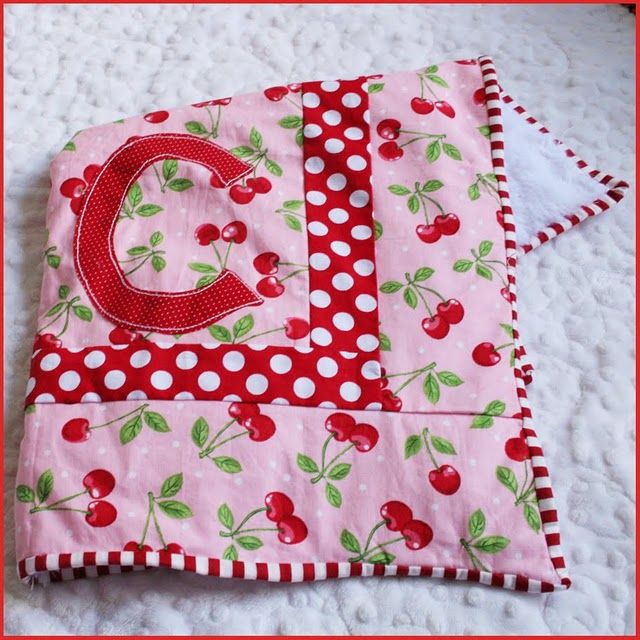
I decided I wanted to make quilts for my boys this year for their birthdays.  My Sawyer turned four on June 20th, so on my birthday May 24th I started his quilt!  At that time it was the fastest I finished a quilt until this quilt just recently.  I got Dino Dudes from Michael Miller at Natasha's Shop Skye Reve and knew this would be the perfect prints for a little guy.  I am so in love with color lately, I couldn't wait to get going.


It's square and the perfect size for a kid.  (I don't have the exact measurement in front of me and he's currently sleeping and snuggled in it!  But it's somewhere around 48" x 48")  When he opened it he said, "Oh, it's just a blanket."  But later he had more enthusiasm for me :)


It's a really simple and great pattern that we'll be adding to our shop in a couple of weeks.  If you'd like us to notify you when it's available let us know in the comments or email us at myquiltstory@gmail.com


I decided to do a focus square in the middle.  Those dinos are just too cute!  Plus I love fabrics that lend to fussy cutting.


I just did simple straight line quilting.


Sawyer picked out the backing.  I showed him a few minky fabrics that coordinated with the quilt top (he hadn't seen it) and asked him which his favorite was.  He chose red! I was really surprised, I don't do red a lot and I never do red for my boys ie clothes, decor, etc..  I am so much more of a blue/green girl.  But I am really happy that he took me out of my comfort zone!  (And I washed it probably ten times with white fabric swatches to be positive it wouldn't bleed.)

I don't have a full shot of the backing on this, totally spaced it.  I did get some snapshots though.  Through the center of the red minky on the back are more squares, then his name appliqued and a heartfelt quilt tag. I did a tutorial on the embroidered quilt label HERE.


\I went with orange dots for binding, I thought it fit in the colors but didn't stand out too much.

I just love this local park where I did the photo shoot.  I'm in Arizona so I get these lovely palm trees for my background.  This palm tree had the perfect notch to hang my quilt from. I think I'll be taking my next quilt here too!


Thank you so much for stopping by!  I hope you'll head over to Quilt Story and see our other quilt there, here's a little peak:


And thanks so much to Amy for hosting the festival!  You're the best! 
Amy'sCreativeSide

Wednesday, May 19, 2010

How to make a tie shirt

After having my second little boy I knew that I'd have to get creative if I wanted to make things for my little boys!  I can't remember where I first heard of or saw tie shirts, but I love them.  They are just nerdy enough to be perfectly adorable!

I searched through blogs and etsy observing how everyone else made their shirts, and finally settled on the way that I love :)  I will share with you here how I make my tie shirts, and hopefully you'll love them too.

Materials needed:

-plain t-shirt or onesie
-heat n bond or some kind of fusible web for applique
-fabric for tie (scraps)
-sewing machine

Step 1:
Trace the tie pattern onto the paper side of your heat n bond.  I separate the two pieces, the knot and the tie.  I like the pattern of the knot to be in a different direction than the pattern of the tie.  I have included my templates for you here, in sizes 3-6 months and 2T.  Using a ruler you can make these shorter/longer and wider/thinner.  My suggestion is that the tie is within 3-4 inches of the bottom of the shirt.  I find if the tie ends too high on the shirt it's just nerdy enough to be down right nerdy.  Roughly cut around the pieces and iron to the wrong side of your fabric, like so:

Step 2:
Following the directions of your heat n bond, cut exactly around the tie, peel of the paper and iron to the shirt. It's now ready for you to sew around. Sew.

Step 3:
Stand back and admire! They're that easy. I think the trickiest part is picking the right fabric stripes and plaids work amazingly and the right size and length for the ties.

Step 4:
Adorn cute cousin boys with matching tie shirts.  Perfection!


As always, we will be linking these cutie pies to some linky parties, so check them out.  Seriously you can find some amazing talent at these parties!

Wednesday, April 14, 2010

The Bad Sister

See, I'm the bad sister.  We take turns posting, and it's my turn to do a few...well see the last post??  Over a week ago!  Heather and I are always talking about our blog, what we can post, what we can giveaway, how to get more followers...but execution on all these ideas is just so hard sometimes :)

I guess I can blame some of it on Easter, right?  Do you want to hear a tragic story?  Well I guess "tragic" in the context of crafting.  I have a new sewing machine that has been giving me problems since I began using it in January...it has brought me to tears and cuss words too many times.  Well Saturday night, the night before my boy's will make their grand appearance in their Easter outfits, it stops working.
IT WILL NOT SEW, AT ALL.
I was just making hats for them, and I had one loop around to finish my baby boy's hat, I had already finished my older boy's:
Cute hat huh?  Wouldn't it have been doubly cute on baby Oliver too?  Oh well, I get my machine fixed on Friday.  
(by the way, the hat pattern is by Izzy and Ivy designs: Jack n Jill Hat)


On to my next project...so a friend and I are lucky enough to host a project night once a month.  We are part of a club for spouses of the school my husband attends...and we have LOTS of fun.  It's awesome because we get to decide what projects we do, so we poke all over blogland and Etsy and get to pick from all the adorable projects.  I especially like this month since we made fabric flowers.  Since I don't have a daughter, yet, I love doing girly things. We found this flower tutorial on Maize in Montana.  I love how they turned out, and who doesn't love a fabric covered button:
And the second flower we made I ADORE! They are my new faves.  (You can kinda see I'm wearing a GINORMOUS one in my Easter photo). They are cute 5 petal flowers and the tutorial was on Pink Paper Peppermints .  I like these so much because they are different than so many of the flowers that I've seen lately.  And they are equally cute using different fabrics as they are using the same:

There you go, that's what I've been slaving over.  Now I am the formerly bad sister :)

We've linked up with We Are THAT Family. and amylouwho.

Monday, February 15, 2010

*Tear, sniffle*

Heather and I like to keep things light on our blog, but today I'm going straight up serious.

June 20, 2009 was our son Sawyer's 2nd birthday. Around 2 am that morning my husband was driving across many states to catch up with me and the boys while we were vacationing in Utah, and to make it to our boy's big day.

I was sleeping at Heather's house. Around 8 am she knocked on the door where my now 2 year old, 6 month old and I were sleeping. She was standing there, a phone in one hand holding onto the door frame with the other. She was shaking like crazy and whispering for me to come to the door.

When I got to her I remembered my husband had been driving through the night. The first thing she said was, "He's okay, but Ernesto's been in an accident."

He rolled. He flipped. He crossed the median into the other lane of traffic. He landed upright. A mother and daughter were the only other car on the road, and they came to his side and called 911.

He was taken in an ambulance to Cheyenne Regional Medical Center in Wyoming. They did all kinds of tests, and miraculously he was okay.


A reunion more special than Sawyer knows.
I vividly remember seeing my boys awake a few minutes after hearing the news and their huge brown eyes staring back at me. For a moment I allowed my mind to go to the place where my husband wasn't coming home...it made me realize more than ever before that he is irreplaceable to us.


Now, to bring it all back to crafting, where ultimately everything must go :) When he was taken to the ER they cut all of his clothes off him. He was wearing a nice brown button up shirt that was cut to shreds. When we got all of his stuff I knew I wanted to somehow use that shirt as a reminder of all the emotions from that time.


The brown border and "families" are from his shirt.

I started with a piece of muslin and traced "are" and "forever" with pencil onto the fabric. I embroidered those words. I printed and traced "families" and used fusible web to attach it to the muslin. I hand appliqued this because my machine skills are not that great on such small letters. Then I pieced the borders to fit in a 8 x 10 frame ($3 at Walmart). I put a thin piece of quilt batting and didn't use the glass.

I love how it turned out. It makes me happy every time I see it. I stressed a lot about how I would use it, what I would say, I wanted it to be perfect. But ultimately I went simple, and for this project I think that was just right.

Monday, January 4, 2010

I felt for it

Ha ha ha. I thought long and hard about my title, I really wanted to use a pun and I did.
Bless my heart.

So I am in love with this felt food more than my son is. I purchased the pattern on Etsy from a shop called BuggaBugs. All I want to do is make more and more.

Sometimes I imagine I walk into my sons room and he's sitting on the floor wearing suspenders and a newsboy cap. He has a wooden truck he's rolling across the floor and he looks up at me and greets me with an English accent. Wouldn't that be adorable?

Did you have any homemade gifts that you loved more than the receiver?

PS Partying with A Soft Place to Land, The Girl Creative, Made by you Mondays, It's so Very Cheri, Reinvented, We are THAT family, Blue Cricket Design, Finding Fabulous and


Saturday, May 2, 2009

A Beautiful Quilt

We are linking up with Beautiful Life Friday at The Inspired Room. We hope you like our quilt and our blog, take a look around!
As Heather showed with Sophie's Quilt, our mom makes gorgeous quilts for our babies. She made this quilt almost 2 years ago and I love it! The fabric is mostly Shagri La by Moda. I love the greens and blues together on a cream background. She adjusted the pattern a little to make it longer instead of square, and I love that because I will be putting this on his soon-to-be toddler bed. Here is a close up shot, we put his hand print on it, which I adore of course! He was several months old when we did it, so no, that's not a newborn's hand.
This fabulous quilter, our momma, has designed a new pattern for us, and it is amazingly cute! You can see the pattern and picture on our sidebar, it's called Snakes, Snails and Weiner Dog Tails.

Thursday, April 23, 2009

Thrifty decor ideas

My son's room has tons of decorations in it, and it was all done very inexpensively. I use a lot of scrap fabrics and papers when I decorate.
This was a gift my sister made, a growth chart we can take wherever we go. Her husband cut and built the frame, she decoupaged paper on the inside and painted the numbers. Now I added the vinyl lettering of my son's names, and I'm keep track of their height on the sides! I absolutely love this. I made these flags from leftover fabric to go across the rail of the "loft". I just used pinking sheers to cut the flags and sewed them into double folded binding that I purchased for a couple dollars.

This is the reading nook under said "loft". We put white Christmas lights underneath, which my son loves and it absolutely brightens the space. The trunk is my hope chest which had already been painted, so I painted over it to add the argyle. I made the pillow and doggy from leftover fabrics from his bedding. And in the frame is a picture of him pondering, and it says "The Adventure's of Sawyer".

Here is his crib, where I did make all the bedding. I won't say it was easy or fast, but it definitely was cheaper than buying! The frames are mirrors from Ikea, $1.99, I painted them and glued in my own photos. I spray painted the shelves to be brown. The "S" was plain from JoAnn's, I added the paper and ribbons...let's see, anything else? And no, I didn't make his blessing outfit that is hanging, I wish I did though :)

I really love Sawyer's room! It is kinda jam packed with decor, but it makes me happy whenever I walk into it! Thanks for visiting our blog!
And this, my quilting friends, is my very first quilt! Looking back there are some changes I'd make, but I do love it.
PS Check out Decor Mama and her fabulous site, she links up every Friday to show off your fabulous thrifty finds!