Photobucket Photobucket Photobucket Photobucket Photobucket Photobucket Photobucket
SPACER
Showing posts with label gift idea. Show all posts

Monday, December 20, 2010

Winner and Last Minute Idea

Sorry for the delay, I meant on Friday to post the winner of my stash...but I forgot!  Drumroll...

And follower #34 is Kwiltmaker!  Which is very exciting for us to have a true reader win, she's been with us since the beginning!  Congrats!  The other winner is announced on Quilt Story.

A couple of months ago my niece was going to take the ACT's.  We'd been texting back and forth about it and I decided to create a funny little study package for her.  The great thing about this idea is you can be totally creative about it and turn it into a gift for anyone!


Take packaging like this.


Remove labels.


Create new labels. I use photoshop. You could make them by hand with paper, online with picnik, etc.


Then you're left with a cute package like this!!

Wednesday, August 11, 2010

Burp in Style!

I made up a few gerber diaper burp clothes...super fun, easy and cute!  Just a little heat and bond, I did a straight stitch right close to the edge...


If your machine has the capability, play with the embroidery stitches. Makes is personal and a little extra cuteness doesn't hurt anything!


I used my funny little animal prints. Love how they turned out...

And if you think your baby only needs burp clothes for the first few months, I have been using these on my 3 year old girl. Yucky noses, faces etc. I think I will need them around for quite a while!

Hope you like! linking at amylouwho

Tuesday, July 27, 2010

Meet my friend Sara

Today I'm trading blogs with my bestest crafty friend, Sara.  Do you know how I met Sara?  I moved to Missouri where my husband would be going to school.  Sara and I knew of each other, but for several months hadn't really talked much.  One day in Walmart (the only store in town) she spotted me.  I was on the phone with my sister, of course, and she came over with a card and her number and said to call her and we should hang out that afternoon!  And so, we did...and since then we have had many a crafty date.  Oh how I wish I could be like her and make friends so easy!  She really is such a great friend, and today she is sharing a tutorial with us, so here is Sara!

(ALSO Sara is part of the Midsummer Blog Party and giving away an adorable minky blanket, go here to enter.)


Hi, I'm Sara.
a.k.a. SewSara.
I guess I'll tell you a bit about myself.

I love to sew and create.
Sometimes the ideas in my head are better than the finished product. Actually, most of the time.
But it's all about trial and error. My kids don't know the difference when I make them pj pants and the crotch hangs to their knees, right?

My tagline on my etsy shop says, "making use of my home ec degree." It's true. I went to college for this. Ha! I never taught high school like I thought I would, but it makes for a fun story anyway (and all those fun student loans to show for it).

Some of my favorite things in this world are: fabric, polka dots, mod podge, spray paint, paper goods (I loooove office and stationery stores), diet coke, donuts, the color red, and oh yeah - my three kids (Max, Ruby, and Simon).

This is my first time doing a blog trade ... I'm excited! Thanks for having me, Fresh Poppy Sisters!


I'm always on the lookout for cute towels to make bibs for my kids. I usually can't find them so I make them like this (or this). But they are way more time consuming that way. (That's why you don't see many in my etsy shop right now).

The towel makes it so much easier. And these are my favorite because they last forever -- even my 5-yr-old and 3-yr-old still wear them when we eat spaghetti (they call them "spaghetti bibs") or do art!
And now that baby Simon (my 6-month-old) is tasting his first foods, he's wearing them, too.
And I can just wipe his face with the towel bib ... it's great.
Plus, I hear that some of those plastic bibs have nasty chemicals in them.
So -- keep your eye out for cute towels! I look in the kitchen and bath sections.

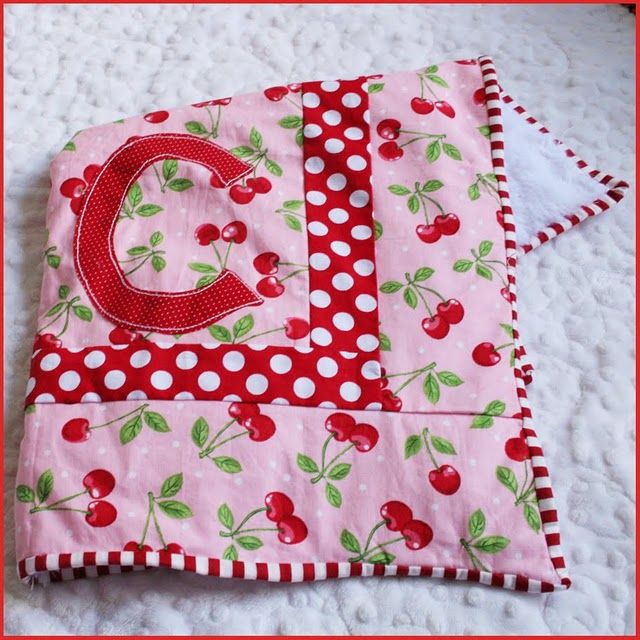
I found this towel at the DOLLAR STORE, so I pre-washed it to make sure it didn't fall apart.
So far, so good. I guess we'll see if it stands the test of time.
If not, I'm only out one dollar (obviously).


You should be able to click on any photo to see it full size.
I never know if I'm being detailed enough, so please ask questions in the comments if
I've left out anything!


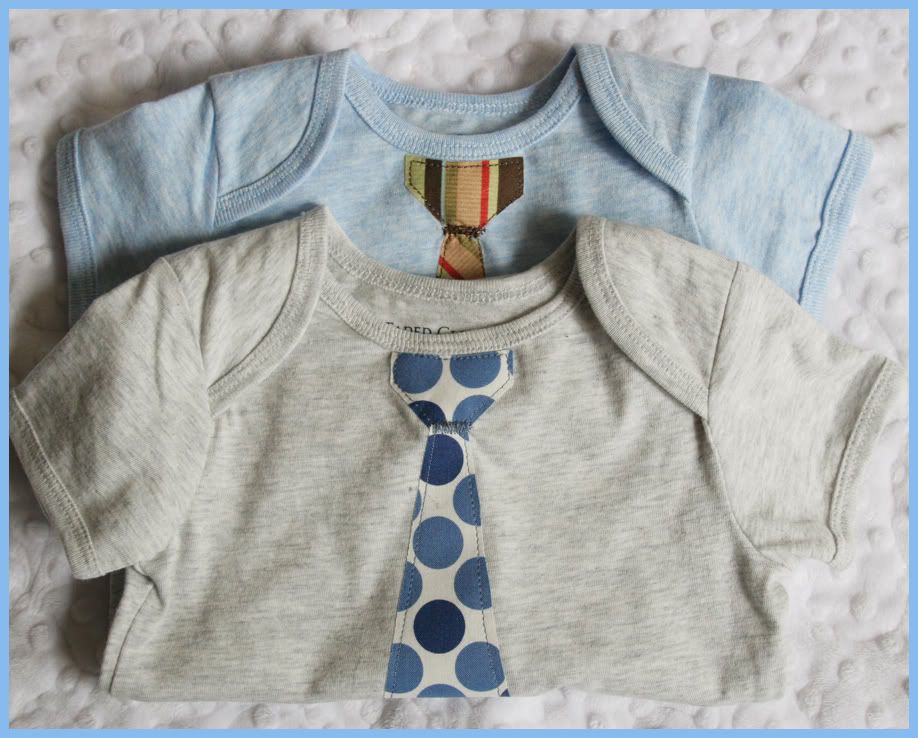
Now... prepare the ribbing for the neck piece.
Make sure you cut it so it stretches length wise. 
This is 100% cotton rib knit. If you're not sure what to buy, ask at the fabric store
and they should direct you to the right stuff.


I have an applique tutorial here. Or Megan did one here.

If you try it, I'd love to hear from you!
Hope you enjoyed the tutorial and hope it made sense.

Please leave a comment for Sara (don't we all love those??), go to her blog, become a follower...ya know, the works!!

PS Linking to our Weekly parties here, The Shabby Chic Cottage and somewhat simple, and Amylouwho,  so check them out!  Oh and we're new party goers here:


Black Kats Design

Thursday, July 15, 2010

Left over Minky project idea...minky balls...

Check out these adorable minky balls! Our mommy made them for our babies with leftover minky. She acutally made about 30 of them. I think the idea was to sell them on etsy, but she decided it wouldn't be worth it.  I think she donated them all because she is nice! I would have saved them for never ending babyshower gifts.

There are tutorials out there. Sorry we don't have one for you. But make sure to add a cat toy inside. Better than jingle bells because the bell will not ring inside of all that stuffing. But the cat toy has the bell inside a plastic ball, so it is protected.


Our babies love these. Plus, and more importantly, they look super cool and hip while playing with them. Speaking of super cool and hip. I bought the huggies cool dude denim diapers for Weston. We love them on him. The older sisters laugh and laugh. If you haven't seen the commercial for them, I highly recommend it.


I don't know when or if I will attempt one of these, but definitely a project to put on that "to do someday" folder. Right?

Linking with AmyLouWho.

Wednesday, May 19, 2010

How to make a tie shirt

After having my second little boy I knew that I'd have to get creative if I wanted to make things for my little boys!  I can't remember where I first heard of or saw tie shirts, but I love them.  They are just nerdy enough to be perfectly adorable!

I searched through blogs and etsy observing how everyone else made their shirts, and finally settled on the way that I love :)  I will share with you here how I make my tie shirts, and hopefully you'll love them too.

Materials needed:

-plain t-shirt or onesie
-heat n bond or some kind of fusible web for applique
-fabric for tie (scraps)
-sewing machine

Step 1:
Trace the tie pattern onto the paper side of your heat n bond.  I separate the two pieces, the knot and the tie.  I like the pattern of the knot to be in a different direction than the pattern of the tie.  I have included my templates for you here, in sizes 3-6 months and 2T.  Using a ruler you can make these shorter/longer and wider/thinner.  My suggestion is that the tie is within 3-4 inches of the bottom of the shirt.  I find if the tie ends too high on the shirt it's just nerdy enough to be down right nerdy.  Roughly cut around the pieces and iron to the wrong side of your fabric, like so:

Step 2:
Following the directions of your heat n bond, cut exactly around the tie, peel of the paper and iron to the shirt. It's now ready for you to sew around. Sew.

Step 3:
Stand back and admire! They're that easy. I think the trickiest part is picking the right fabric stripes and plaids work amazingly and the right size and length for the ties.

Step 4:
Adorn cute cousin boys with matching tie shirts.  Perfection!


As always, we will be linking these cutie pies to some linky parties, so check them out.  Seriously you can find some amazing talent at these parties!

Sunday, May 9, 2010

Two Blankets, Two Ideas

I've recently made two pieced blankets for friends, and when I finished I thought they were the perfect patterns for a variety of blankets!  I am going to give you a semi tutorial.  Meaning if you've had a little experience on the machine, you'll be able to make these too.
(They are not difficult to make in the least, however, I am not doing a step by step how-to)

This was for my sweet friend Sara's new baby boy Simon.  I had a few 1/4 yards of fabric and was thinking and thinking of how to piece it and not have it look weird or like leftovers (which they weren't!).
My favorite part is the middle strip.  It'd be cute left alone, or with a variety of applique's.  I considered argyle diamonds, spelling out "sleep" or "Simon"...and ultimately settled on stars!!
On a side note, I made this ball to go with the blanket.  I always feel like I have to have a little something extra to go with "main" present.

Here are the measurements for this blanket.  The finished size is 38" x 23".  The measurements in the diagram below are what I cut the fabric, prior to sewing.  My seam allowance is 1/4".


Here is my pieced blanket #2.  This is a car seat blanket.  Heather and I discovered these about three years ago when we were making blankets for our soon to be babies, who were born only two days apart!  It is so nice to have a small blanket to squish around your newborn, instead of a full size blanket that you have to fold 8 times to get around them.

The same story for this one as well, it would be adorable without any applique at all...however an initial, heart, crown, etc. could make it so sweet too!
They can be finished by binding the edges or just simply turning inside out with a finishing stitch around the outside.  Either works. 

And when the baby gets older, it's a great little blankie to play peek-a-boo with :)
I always have to try and sneak one of my boy's in a photo shoot.  Guess it was Ollie's lucky day!
The finished size for this blanket was 24" square.  Once again, the measurements below are what the pieces were cut to, prior to sewing. My seam allowance is 1/4".
There you have it!  Two basic patterns to make a variety of easy pieced blankets!

If you are feeling adventurous and want to give one of these a try, please link us!  We'd love to see your finished project.  If you are a little nervous but would like to try it out, contact us because I'd love to answer any questions.

Happy Mother's Day!!  As for me?  Looking forward to snuggling on the couch with my oh so busy husband and watching a movie of my choice.  Mmmm can't wait.

Wednesday, April 14, 2010

The Bad Sister

See, I'm the bad sister.  We take turns posting, and it's my turn to do a few...well see the last post??  Over a week ago!  Heather and I are always talking about our blog, what we can post, what we can giveaway, how to get more followers...but execution on all these ideas is just so hard sometimes :)

I guess I can blame some of it on Easter, right?  Do you want to hear a tragic story?  Well I guess "tragic" in the context of crafting.  I have a new sewing machine that has been giving me problems since I began using it in January...it has brought me to tears and cuss words too many times.  Well Saturday night, the night before my boy's will make their grand appearance in their Easter outfits, it stops working.
IT WILL NOT SEW, AT ALL.
I was just making hats for them, and I had one loop around to finish my baby boy's hat, I had already finished my older boy's:
Cute hat huh?  Wouldn't it have been doubly cute on baby Oliver too?  Oh well, I get my machine fixed on Friday.  
(by the way, the hat pattern is by Izzy and Ivy designs: Jack n Jill Hat)


On to my next project...so a friend and I are lucky enough to host a project night once a month.  We are part of a club for spouses of the school my husband attends...and we have LOTS of fun.  It's awesome because we get to decide what projects we do, so we poke all over blogland and Etsy and get to pick from all the adorable projects.  I especially like this month since we made fabric flowers.  Since I don't have a daughter, yet, I love doing girly things. We found this flower tutorial on Maize in Montana.  I love how they turned out, and who doesn't love a fabric covered button:
And the second flower we made I ADORE! They are my new faves.  (You can kinda see I'm wearing a GINORMOUS one in my Easter photo). They are cute 5 petal flowers and the tutorial was on Pink Paper Peppermints .  I like these so much because they are different than so many of the flowers that I've seen lately.  And they are equally cute using different fabrics as they are using the same:

There you go, that's what I've been slaving over.  Now I am the formerly bad sister :)

We've linked up with We Are THAT Family. and amylouwho.

Monday, April 5, 2010

A Grown-up Idea

Do you have a hard time finding a gift to make for grown-up people?  Because I do.  (And no, this isn't an infomercial).  When my friend celebrated her birthday a few weeks ago (Happy Birthday Gen!) I went scouring through blogs trying to find something I could make, and I came along these.

They were super easy to make and I love how they turned out!
Instead of using napkins, I made some cute designs in photoshop and printed them on to cardstock.
They were simple and inexpensive...the only thing that took time was the drying.  Her tutorial is great, so make sure to read hers if you're going to make them.  The basic idea is you mod podge paper to the front of the tiles and also over the top of the paper to seal it. Then hot glue corkboard to the bottoms.  And to finish, you spray with an acrylic sealer.
And yes, you can buy most of this (except tiles) at Walmart.  The finishing spray was with the craft things and the corkboard was in stationary!

Voila!  I am so happy to have a grown-up gift idea to add to the list. Linked at Today's Creative blog, Reinvented, Craft Edition, Silly Little Sparrow and soft place to land!