Photobucket Photobucket Photobucket Photobucket Photobucket Photobucket Photobucket
SPACER
Showing posts with label freezer paper. Show all posts

Wednesday, June 9, 2010

I'm Dreaming AND a reveal...

It's official.  I am moving 1,400 miles away.  Whoa.  I have 10 days.

I recently made over my bedroom...although there are a few things I'd like to still do with it.  So,
today I was dreaming of all the things I could add to my new room once we arrive in Arizona.  See, I'm moving from what could be compared to a really crappy place to a really nice place.  I've got hardwood floors throughout.  Which means a lot of rugs.  And I'm finally ready for my room to be DONE!

For starters, I'd like this vanity for my room.

Wouldn't I look adorable in that chair working on my blogs?  (I would.)

Then I'd like this chair to be sitting in an opposite corner:
That's where my husband would sit and look adorable reading medical books...zzzzzz...

And for our feet, I've been swooning over so many amazing rugs, this is what I want to be the last thing my feet touch before I snooze:

New rugs by Ms. Amy Butler...there were sooo many cute ones I just couldn't decide.

So you want to see what this all matches??

My Kinda Bedroom Reveal.
BEFORE:
This .jpg is titled shame.  This was at the start of my re-do.

PS Did I mention I did this in about 2 1/2 days??  I was crazy and decided to surprise my husband.  I started on Friday and he came home Sunday afternoon.

AFTER:
My fabric inspiration was Joel Dewberry's Deer Valley.
Call me a dumbo-head.  I have all these mirrored frames (to help with my accent color gray) and I didn't think about all the reflection possibilities.  I'm gonna work on that in my new place.
Imagine this:

  • slate gray duvet cover and matching shams behind my accent pillows

  • headboard raised a little

  • pieced quilt laid across the bottom with all my colors

  • an Amy Butler rug on my hardwood floors
that's the plan...
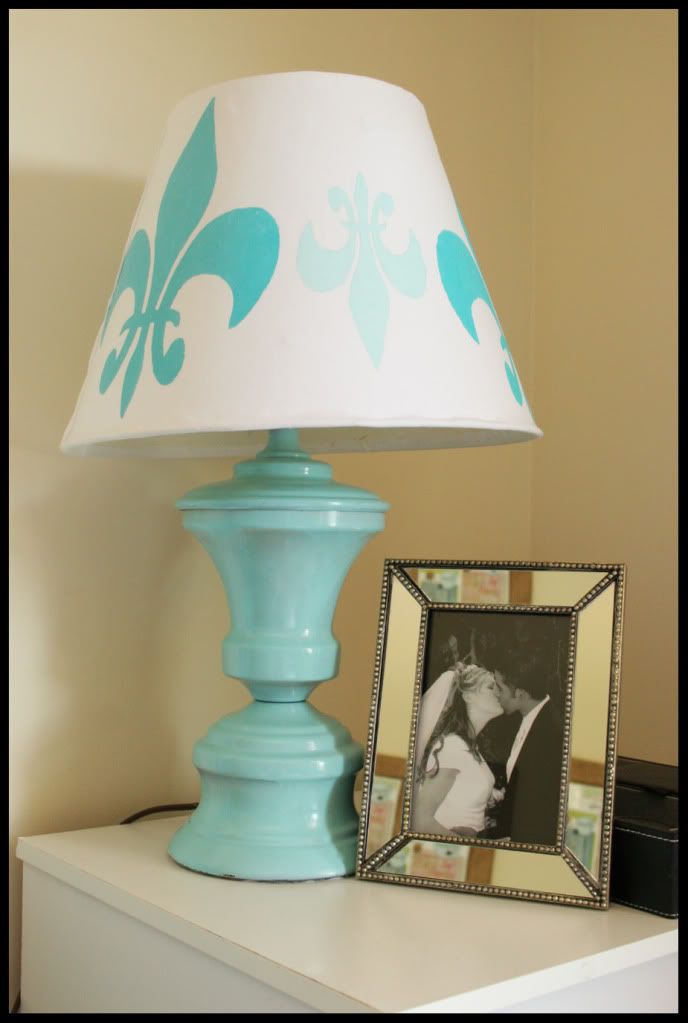
I showed in a tutorial here just exactly how I made those lamps.

And here I talked about re-making this memo board.

What did I do?
Here's the checklist:
spray painted headboard
stenciled and covered lamps
spray painted and stenciled memo board
spray painted a mirror and shadow box with my wedding bouquet inside (not pictured)
made 3 easy (no trim, just slip in the back) accent pillows
filled existing frames with photos
the pictures above the headboard are from our favorite vacation so far...the royal mile in Edinburgh Scotland on the left and Canterbury Cathedral in England on the right


Any tips?  Never share a half-finished project as a reveal in blog land.  It's in bad taste.  :)

PS We love to party, so check out our linky parties because we're linking up!

Thursday, June 3, 2010

Cover that shade!

We've been MIA, once again.  Have you been to our QuiltStory blog?  We've been so excited, we've been working hard on it all week.  Whether you make quilts or just admire, go check them out.  And let me say, these aren't your grandma's quilts, these are vibrant darling quilts that I'd love to have in my own home!! 
my aplologies to grandma's and grandma quilt likers :)

Plus in the morning we'll be featuring my fabulous friend Sara and I'd love to see her get many comments!!

I've been meaning to post this for a bit.  My lovely friend Sara gave me her lamps when she moved.  ...this really isn't a before picture...see they used to be brass lamps and she made the first great leap by spray painting the bases.  I LOVE the color, so I decided I wanted to cover the lamp shades with new fabric, and here's how I did it.


Let me apologize for the awful photos.  With two babies, I do most my crafting at night, thus ugly pictures.

I really wanted to get a white based fabric with some maybe a little aqua design to cover the shades with.  Shockingly I was unable to find such a fabric at Walmart or the local quilt shop.  I decided to make my own by stenciling.  More on that in a minute.

1. Roll your shade along the wrong side of your fabric tracing the top and then the bottom with a pencil.

2.  Cut about 1/2 inch larger than your pencil line on the top and bottom.


This is how I made my own design.  Do you know about Freezer Paper? It's awesome and can be used in many ways.  It can be purchased at most grocery stores.  There is a paper and shiny side.

3. On the paper side trace your image and cut out.

4. IRON the shiny side to the right side of your fabric and sponge paint into the stencil!  You can make whatever image you want, and the paint won't bleed through the sides.  ALSO, you can reuse the stencils over and over, it irons on and peels off easy peasy.


 5. Trickiest part.  Using Aleene's Tacky Spray adhere the fabric to the shade.  It's sticky and this took some trial and error.

6. Hot glue your edges by folding into the shade.  Add a trim if you'd like!


Ta-da!
When I move to Arizona (we're counting down the days!) I'd like to find the perfect trim for the top and bottom.  I'm pleased how they turned out, definitely a statement!